数年前から我が家のバスルームでは蛇口から水漏れが発生。
そこまで酷い水漏れではないため、まぁ放置してたわけです。
しかし、最近はシャワーヘッドからもポタポタとこぼれるようになり、
そろそろ何とかしないと、、、となったわけで今回の内容は旅ではなく修理です。
シャワー・ド・バス
水漏れの修理なんぞ素人では難しいだろうと思い、業者へ依頼しようと修理費用をネットで調べてみた。
そーすると、予想以上に高い修理費用がバンバンあがってる。
人件費や技術料的なもので数万円は覚悟しないといけない。
((((;゚Д゚))))
んで、
今はたっぷり時間もあるので素人でも挑戦してみようと思ったわです。
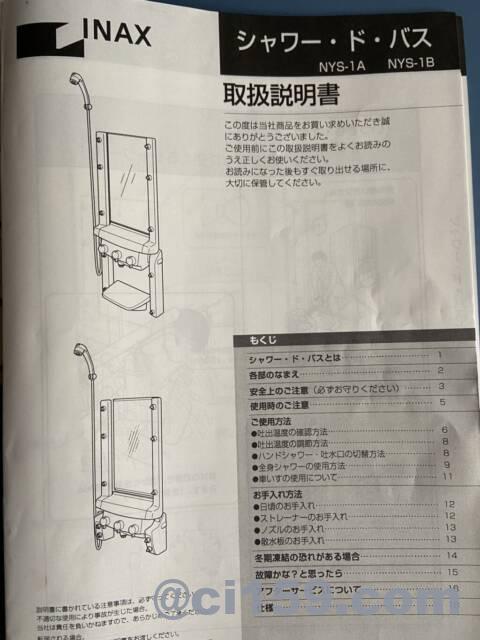
まず行ったのが、我が家にあるシャワーバスのマニュアルを見ること。
INAX シャワー・ド・バスNYS-1A
ってのが製品の型式になるみたい。
もう17年くらい前のモデルなので決して新しい製品ではない。
BF-8749T-D-PU
製品の型式やらシャワー・ド・バスって言葉でいろいろググってみたけど、
同じ製品に関する”修理してみた”的なのが見当たらなかった。
正直、50%くらいはダメかと思ったね。
でも、マニュアルを改めてよく読んでみると”配管内の水抜き”って項目に
標準地仕様 金具品番:BF-8749T-D-PU
って書いてあった。
あっ、もしかしたらこの型式で何が出てくるかも、、って少し希望が見えた。
改めて金具品番でググってみるとヒット!
ヽ(=´▽`=)ノ
取替用部品や施行説明書のデータがあったのでシャワー・ド・バスに使用されている部品が判明。
原因
続いて行ったのが、そもそも水漏れの原因ってなんだろう?って思いながらググってみた。
そーすると消耗品に代表される”パッキン”よりも”切替弁”の方が確立が高いらしい。
切替弁とは蛇口やシャワーの切替え、水を止めるために使われている部品。
我が家の場合は蛇口とシャワーからポタポタ水漏れしているので、恐らく長年の使用で切替弁がダメになっているんだろうと推測。
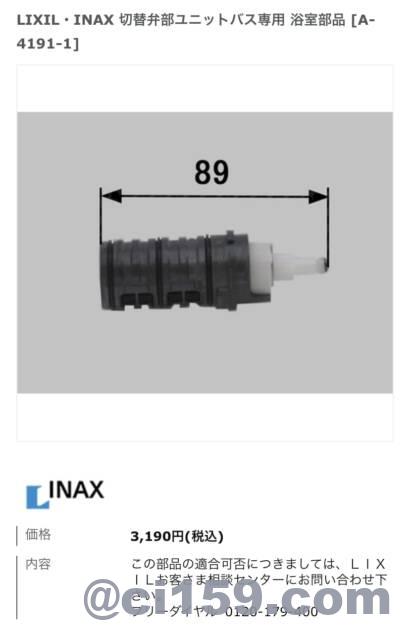
対象となる切替弁の型式はA-4191-1。
これを注文すれば、あとは交換するだけで水漏れが治まるはず。
切替弁A-4191-1
早速ネットで切替弁の型式を入力するとAmazonや楽天で販売されているのを確認。
今回は急いでいたのでAmazonで翌日急ぎ配送(無料)で注文。
写真はINAXのパーツ販売での画像だが、Amazonでも同価格帯で購入可能。
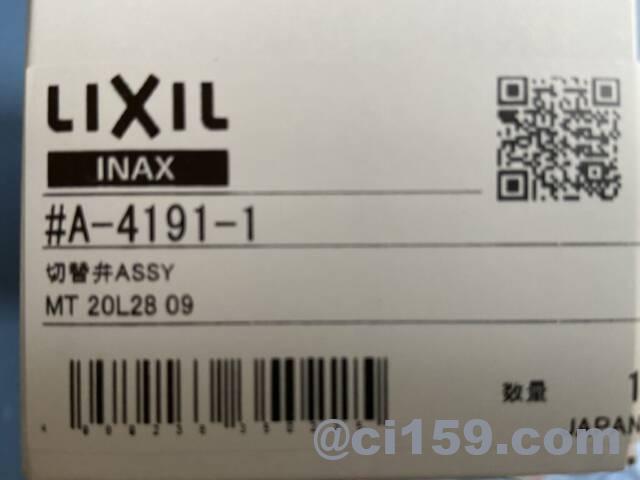
届いた商品は純正で型式と切替弁が箱に印字されている。
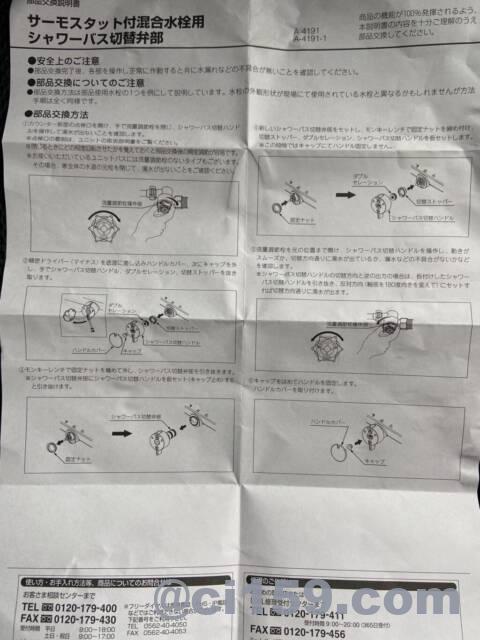
あと、商品と一緒に交換用の説明書が同梱されていた。
この説明書があれば素人でも大丈夫です。
※同梱されていた切替弁の交換手順書
修理作業
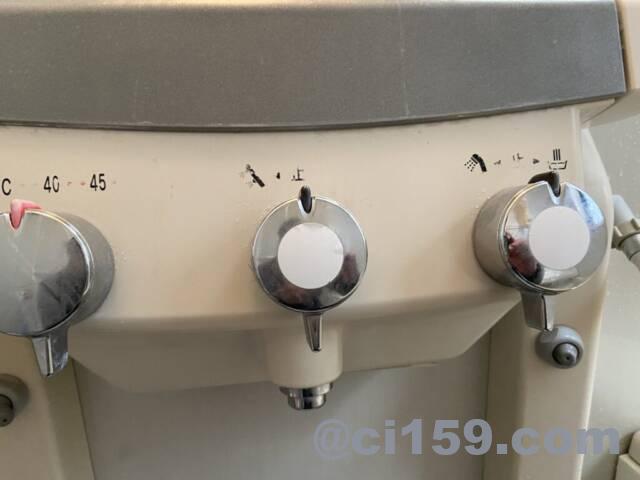
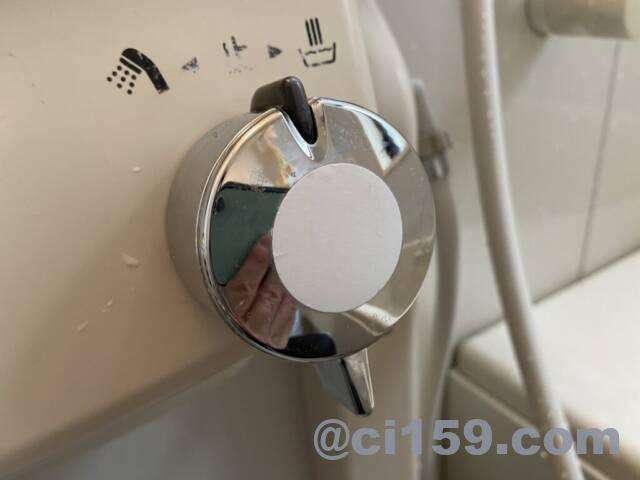
今回修理するのは一番右端のシャワーと蛇口の切り替えハンドル。
左に回すとシャワー、右に回すと写真の下側にある蛇口から水が出る仕組み。
ハンドルカバーの分解
切替弁を交換するには、まずハンドルカバーを取り外す必要がある。
下側に切り込みがあるので、そこに細い精密ドライバー的なものをブッ挿してクイッと押し出してやれば簡単に外れる。
その次のキャップも同じ要領で下側の隙間からクイッと押し出してやると外れる。
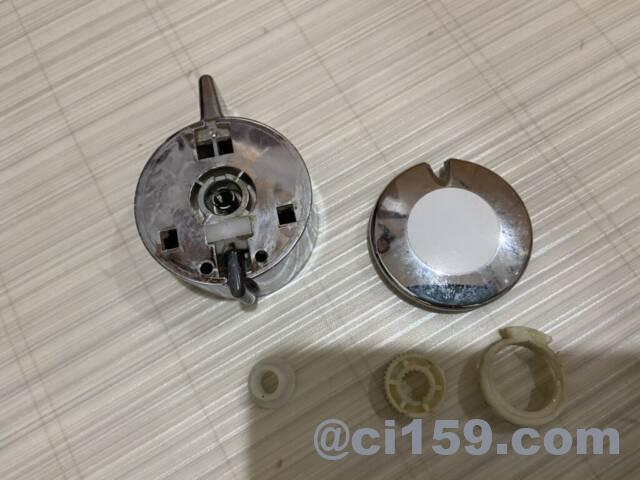
他にダブルセレーション、切替ストッパーといった小さ目のパーツを外せば切替弁が顔を出してくれる。
※写真は外したパーツ類
ここまではすんなり10分くらいの作業。
以外と簡単。
ただ、ココからが思ったより大変だった。
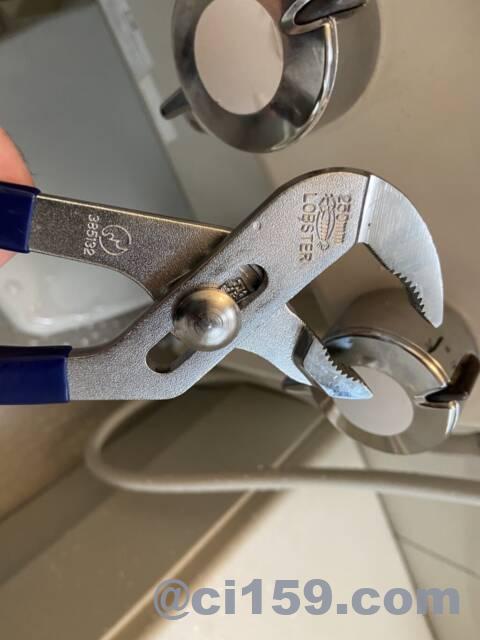
固定ナットの取り外し
固定ナットを外す必要があるのだが、これが、、なかなか動かずビクともしない。
ウォーターポンププライヤーで何度が回そうと試みるもダメで、
┐(´~`;)┌
潤滑油KURE556を吹きかけたりしながら、20分くらい格闘してやっと外すことができた。
この固定ナットを外すのが一番大変だった。
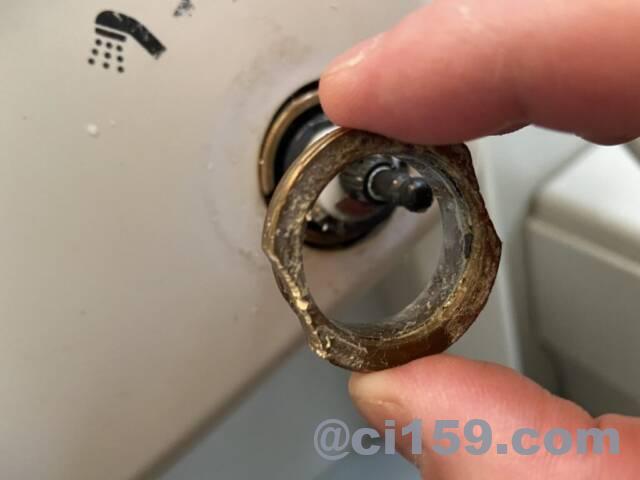
切替弁の交換
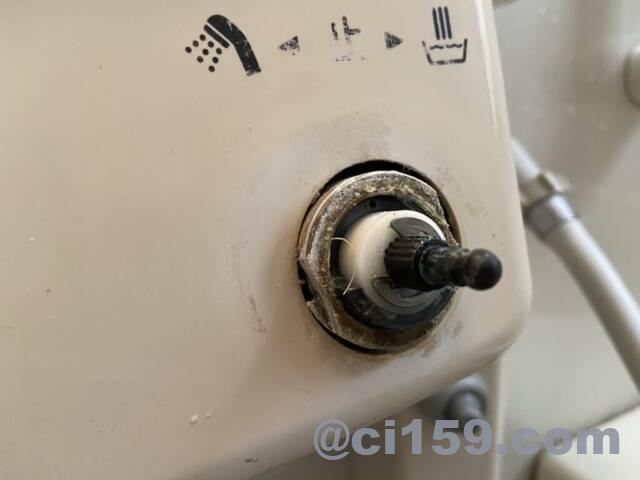
固定ナットを外すと、残るは切替弁がむき出しになっているので引き抜くだけ。
ちなみに、作業前に水の元栓(もしくは流量調節栓操作分)を閉めるのを忘れずに!
コチラもすんなり抜けずに、10分くらい格闘して引き抜くことに成功。
見た目では何がどうダメになっているのか分からず、、
実際、このパーツを交換して水漏れが直るのかもこの時点では不明。
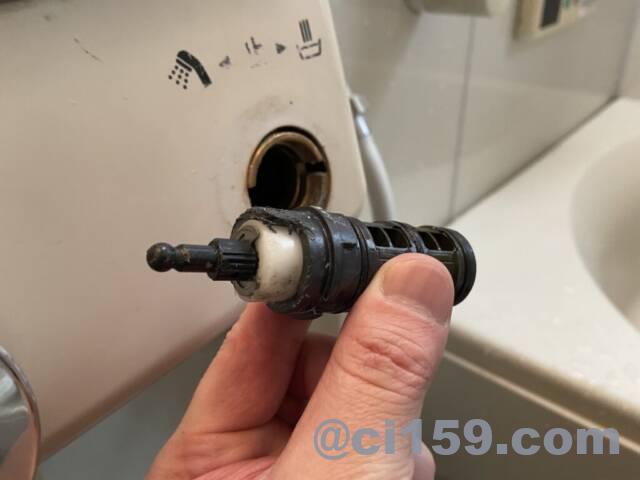
購入した切替弁を差し込むのは全然簡単。
注意が必要なのは元の切替弁と同じように挿し込まないと、
シャワー、蛇口の切り替えポイントがずれてしまうこと。
1回目に挿し込んでチェックすると”止”の位置で蛇口から勢いよく水が出てしまう状態だった。
改めて、切替弁を外すして位置を調整すると無事、元の状態に戻った。
そして、気になる水漏れについては全く症状が出なくなったので修理完了。
(´▽`) ホッ
やはり原因は切替弁だったようだ。
まとめ
・蛇口やシャワーからの水漏れがあればパッキンだけでなく切替弁の交換も検討するべき。
・作業に必要な道具は精密ドライバー(マイナス)とウォーターポンププライヤー。
・作業前には必ず水の元栓、もしくは流量調節栓を閉じること。
・固定ナットが外れない時は潤滑油等を利用してウォーターポンププライヤーを使用すること。
今回、ド素人の私が作業をして約1時間ほどで修理が完了した。
同じようにシャワー・ド・バスの水漏れで困っている方がいれば、是非参考にしていただければと思う。
修理業者へ依頼すれば確実に修理できるので、個人で行うのがいいかどうかは判断が難しいが、
ネット上では他の製品で”やってみました”的な動画も多く見かけられたので、そちらを参考にするのもイイと思う。
とりあえず、我が家のバスルームから水漏れが無くなったので一安心である。
]]>鍵盤が陥没した状態のため修理が必要だった。
ただ、メーカーに修理依頼すると2~3万円と高額なため、ドライバー片手に分解・修理してみた。
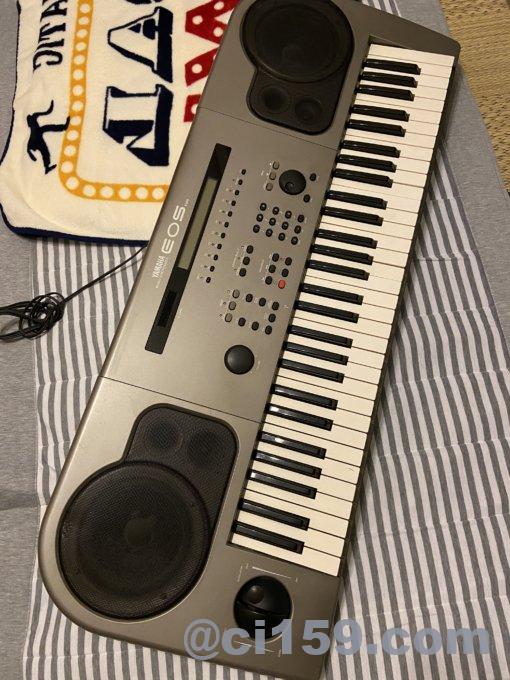
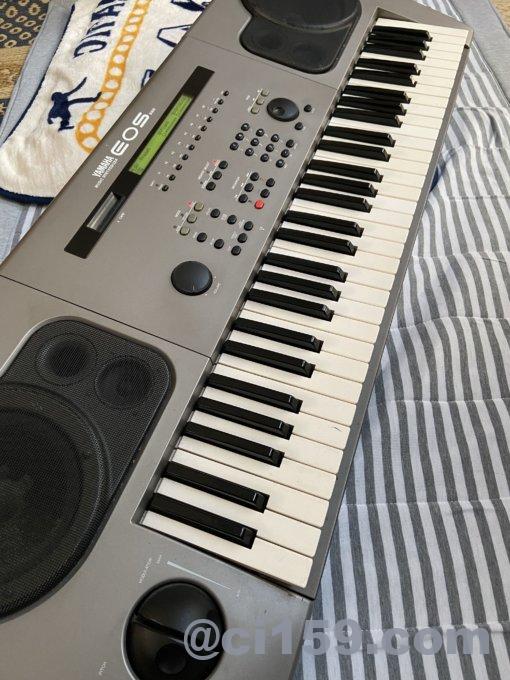
ヤマハ「EOS B500」
ヤマハ「EOS B500」
国内で一番有名なシンセサイザーと言っても過言ではない機材。
EOSといえばCANONのカメラでも有名なシリーズだが、今回紹介するのはヤマハのシンセサイザー。
製品情報
1990年に発売されたオールインワンシンセサイザー。
TM NETWORKの小室哲哉がプロデュースした商品として、テレビ番組やライブでは本人がよく使用していた。
特徴はシーケンサー、リズムマシン、スピーカーを備えたことにより、EOS B500一台でTM NETWORKの楽曲コピーが手軽に再現されるようになったこと。
・61鍵盤(イニシャル・アフタータッチ)
・AWM音源(128種)+FM音源(255種)各エレメントを2個づつ用いて、最大4つの音を重ねて1ボイスのプログラムが可能
・デジタルエフェクト34種類
・シーケンストラック×8、リズムトラック×1、計9トラックのシーケンサーを搭載
※音符分解能4分音符/48
・最大同時発音数24音
・ステレオスピーカー搭載
・デモ曲にTMNの「SECRET RHYTHM」が内蔵
・発売当時の定価168,000円
・重量17kg
ここが凄い!
ヤマハ「EOS B500」の凄いところを紹介しておこう。
・音楽も楽器もド素人の方が欲しいと思う魅力的な外観。
発売当時に小室哲哉がライブで使用していた映像をよく見ていたが、とにかくカッコよく映っていたのだ。
シンセサイザーといえば「 黒いボディ」「液晶ディスプレイ」「たくさんのボタン類」 といったイメージが、
EOS B500は「シルバーのボディ」「スピーカー内蔵」「近未来的」と、、
見た目から興味をそそられるデザインだった。
・当時はまだまだハードルが高かった「打ち込み」を身近なものにしてくれた製品。
・「EOS B500」はステレオスピーカーを内蔵することで手軽に音をだすことができた。
シンセサイザーは基本スピーカーが内蔵されていないため、別途スピーカー(もしくはヘッドホン)を用意する必要があるのだ。
・シンセサイザー初心者にも分かりやすい操作性
・重量が17kgと重いためライブには不向き
鍵盤交換
長々と「EOS B500」の紹介をしてきたが、それだけ思い入れのある商品ということ。
なので、今でも手放すことなく部屋の中で存在感を出している。
その「EOS B500」の鍵盤が陥没したので修理をしてみる。
鍵盤自体はヤマハ製品を取り扱っている楽器屋さんで取り寄せが可能。
※この時、実際に注文したお店は大東楽器さんです。
分かりにくいがソ(G)とファ(F)が陥没してペタペタ状態。
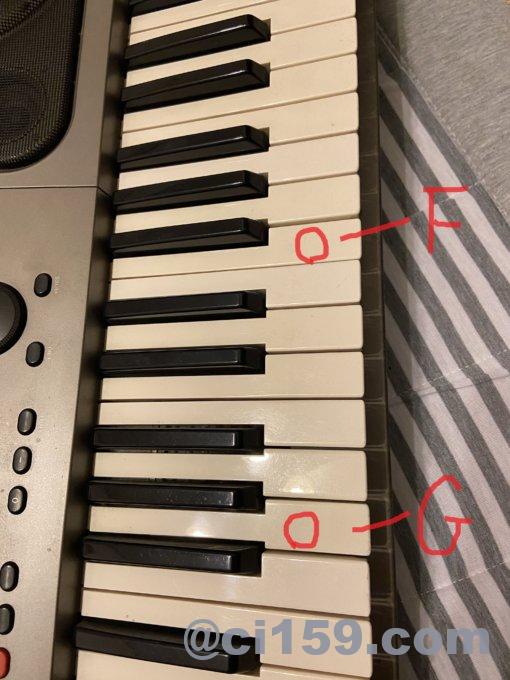
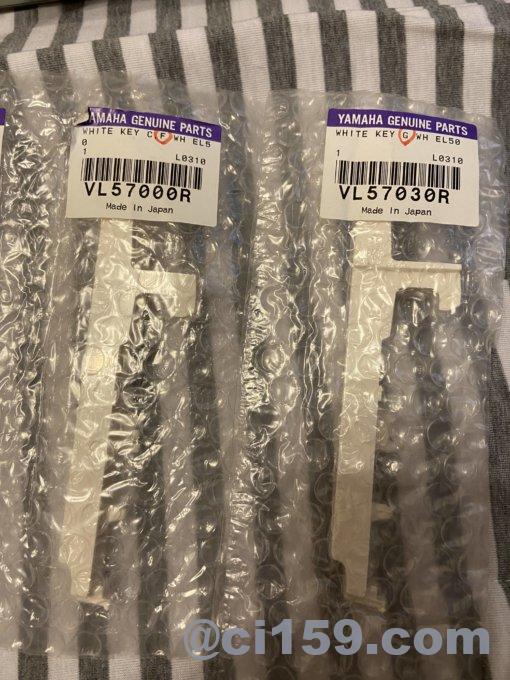
ヤマハの交換用鍵盤。
FとGで微妙に形が異なっている。
1本300円〜400円くらいだったと記憶。
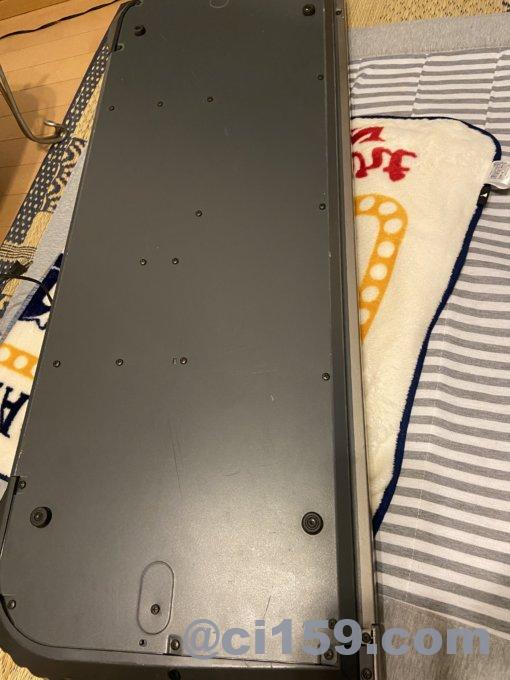
フロントパネルから開けることができないので、裏返して多くのねじを外す必要がある。
この裏蓋を外すのにネジが30本くらいあったと思う。時間にして30分程の作業。
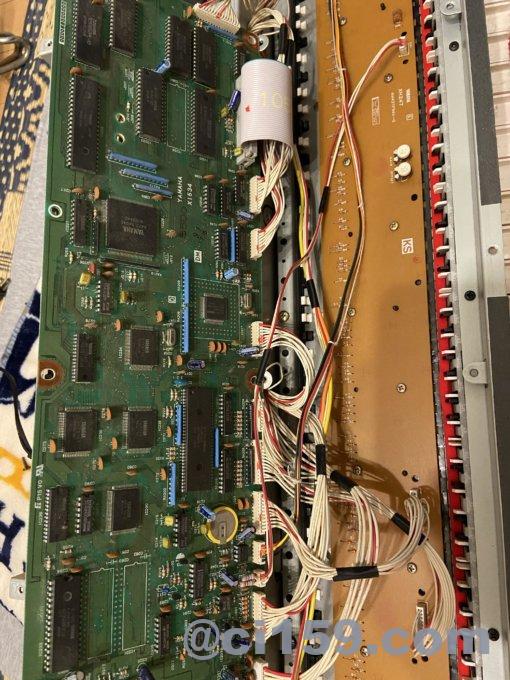
裏蓋を外して内部基板がむき出し状態の写真。
鍵盤は写真右側の緑色基板の下に隠れている。
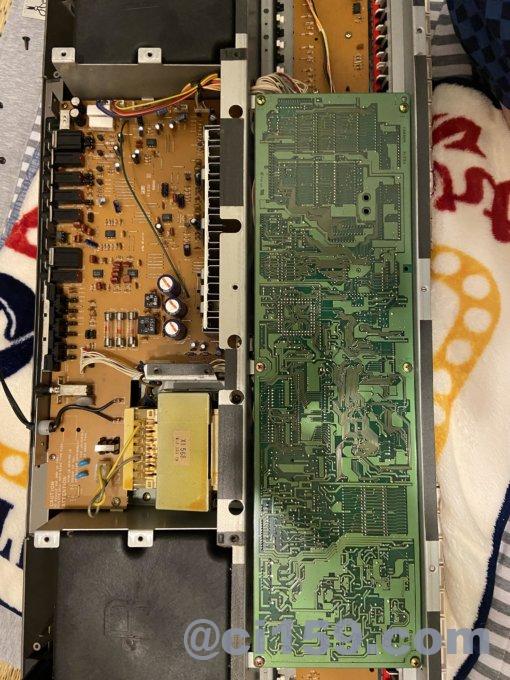
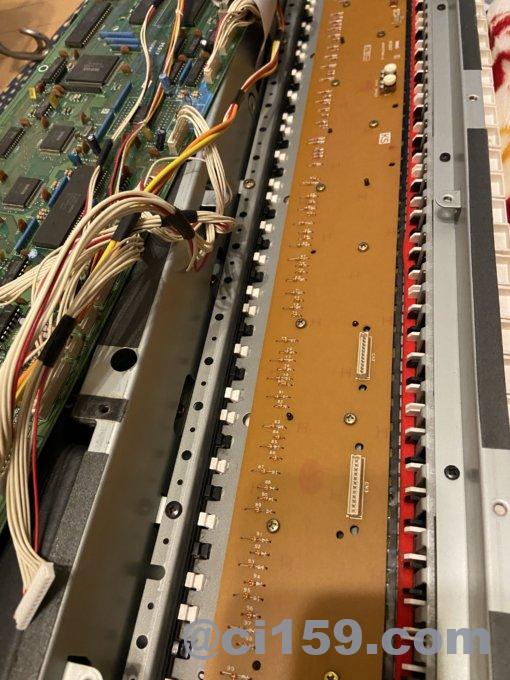
緑色の基板を外すと無数のケーブルと茶色の基板が出てきた。
固定されているネジと最低限のケーブルだけを外す。
茶色の基板も10本くらいのねじで固定されている。
どんどんネジを外す。ここまでくればもう少し。
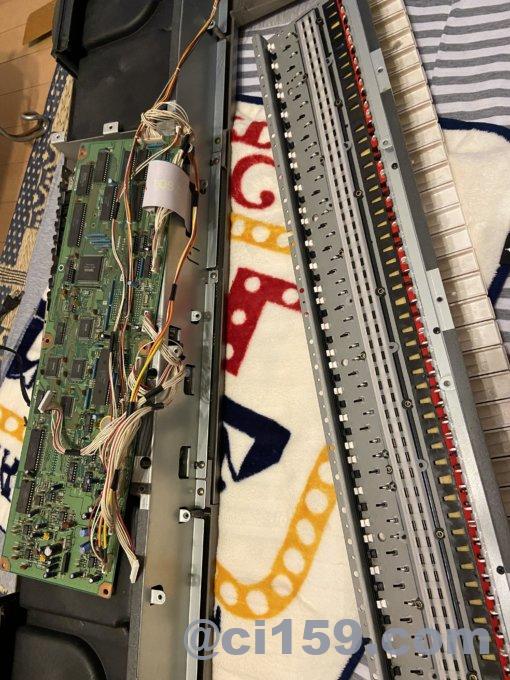
鍵盤ユニットを本体から切り離した状態。
ここまで外したネジの本数は60本ほど。
とにかくネジを外すのに時間がかかる。
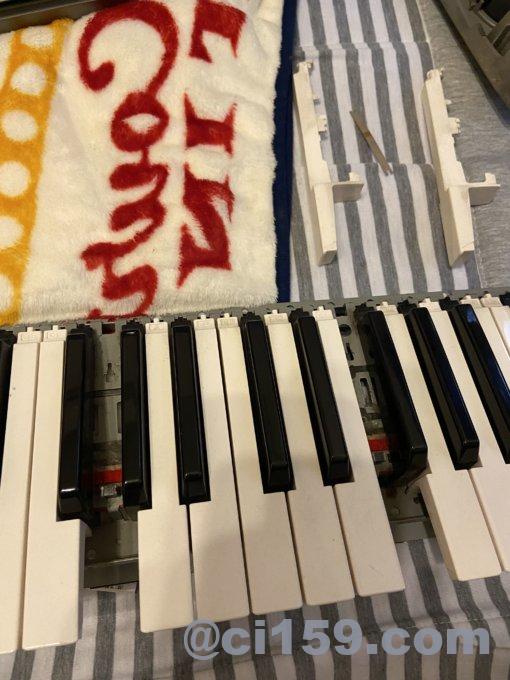
陥没していた鍵盤を外した状態。
隣の黒鍵の位置が関係しているため、GとFでは鍵盤の形が異なるのが分かると思う。
尚、外した鍵盤の間にある細長い銀色のパーツが跳ね返りのバネとなる。
※バネの先端にある切り込みは短い方を本体側に挿し込む
無事、鍵盤の交換が完了して元の状態になった。
作業時間はおおよそ2時間。
やっと終わってウキウキで電源を入れてみると
「バッテリーが無いから交換が必要」のメッセージ、、
まぁ、内蔵音源は使用せずMIDIキーボードがメインの使い方になるからいいか。
プリセット音源は使用可能、インターナル音源の保存が不可の状態。
まとめ
・「EOS B500」の分解にはネジを60本ほど外す必要がある
・鍵盤交換で使用する工具はドライバーだけでOK
・鍵盤パーツはヤマハの楽器を扱っているお店で取り寄せ可能
・鍵盤を取り付ける際、取り付けるバネの向きに注意が必要
※切り込みの短い方を本体に挿す
発売から30年経っても「EOS B500」のデザインとスピーカーの良さは変わらない。
シンセサイザーとしてのスペックは到底今の製品とは比較にならないが、お子様からご年配の方まで鍵盤を触る気にさせる魅力あるシンセサイザー。
一家に一台オススメできるシンセサイザー「EOS B500」。
これからも大切に使っていこうと思う![]() 。
。
これから国内の観光地には少しづつ賑わいが戻ってくるだろう。
特に沖縄は島全体が「密」で覆われることが予想される。
大丈夫なんだろうか、、
とはいえ、海外への渡航はまだまだハードルが高い。
飛行機が減便もしくは運休していることもあるが、そもそも多くの渡航先では簡単に入国、観光できる状況にないのだ。
また、帰国しても公共交通機関を利用できなかったり隔離制限があると一般人の旅行は不可に等しい。
こんな時は他の趣味で時間を満たすべし。
音源モジュールTX802
海外旅行以外にも趣味がある。
音楽制作。
いわゆるDTM、PCやシンセサイザーで音楽を作ること。
古くは「YMO」、80年代の「TM NETWORK」、90年代の「TK」、、
高校時代にはバイト代をほぼ全てつぎ込んで機材を買いあさったものだが、今の時代はPC1台とソフトで完結してしまう。
なんならIphoneだけでも制作可能、、。
録音媒体がカセットテープ時代を経験している者からすれば、なんと恵まれた時代になったことか。
それでも、機材には古くて魅力あるハードが多いものだ。
今回紹介するヤマハの音源モジュール「TX802」はデジタルシンセサイザー「DX7Ⅱ」の音源モジュール版。
8パート、16音ポリで「DX7Ⅱ」を8台分使った音作りが可能という凄さ!
1987年に発売された当時の価格は198,000円。
発売から30年以上経過しているため、数年前に購入した製品はもちろん中古。
そのTX802の電源が入らなくなったので修理してみた。
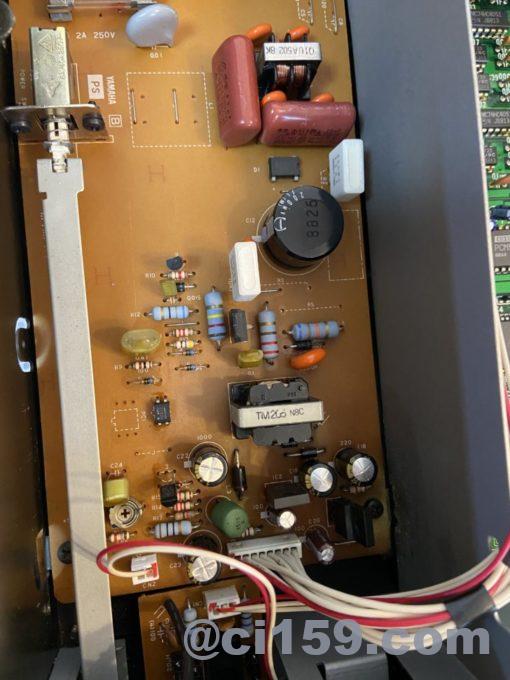
TX802を分解
2Uラックサイズの音源モジュールはビデオデッキサイズで、上部のフタを開けると基板が見える。
電子部品については全く知識がないが、同じTX802の修理工程が他のサイトで紹介されていたので同じ手順で修理してみる。
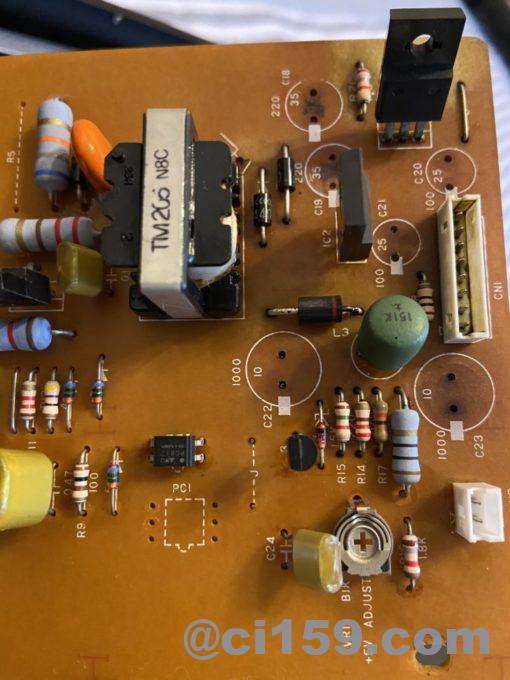
写真上部の緑色の基板はシステム部、写真下側の部品が少ない基板が電源部。

電源が入らない原因はおそらくコンデンサの液漏れ。
TX802のコンデンサは1000μF(10V)×2、220μF(35V)×2、100μF(25V)×2、
計6個が電源基板に使われていた。
この問題となっているコンデンサを取り外してみる。

不具合のあるコンデンサ自体は半田ごてを使って簡単にとることができた。
次はこのコンデンサと同じものを用意する必要がある。
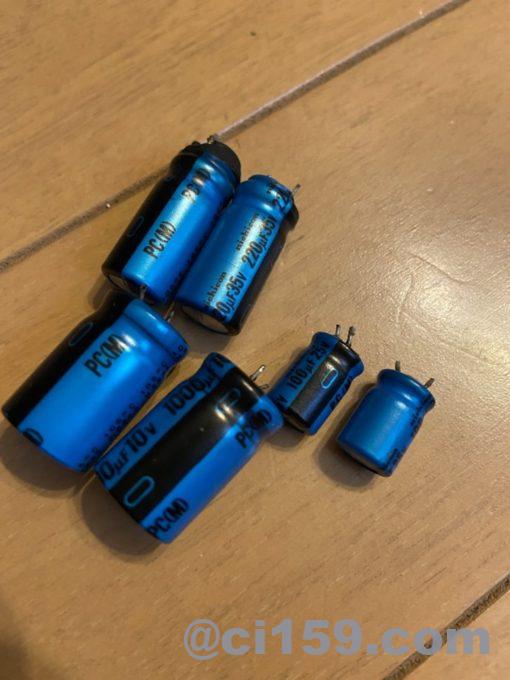
コンデンサ6本を基板から外した状態。
基板に描かれている少し太い白線が大事なポイント。
※極性がマイナス側と分かるようになっている
マルツ大阪日本橋店
コンデンサを購入するには専門店に行く必要がある。
電子関係といえば大阪では日本橋が間違いない。
ネット調べたところ、通販販売もしている「マルツ大阪日本橋店」に訪れてみた。
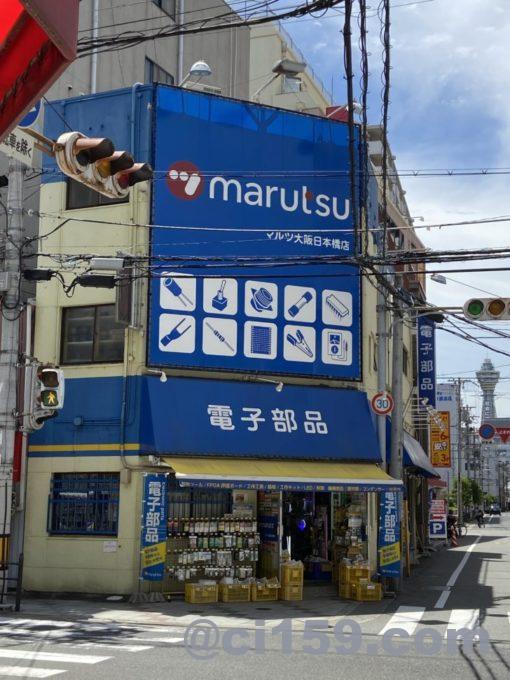
「電子部品」
間違いなく電子部品を売っているお店。
電子部品が好きな方にはたまらないだろう。
店内の奥にコンデンサと書かれた棚があったので行ってみると、ぎっしりコンデンサが箱に入って並べられていた。
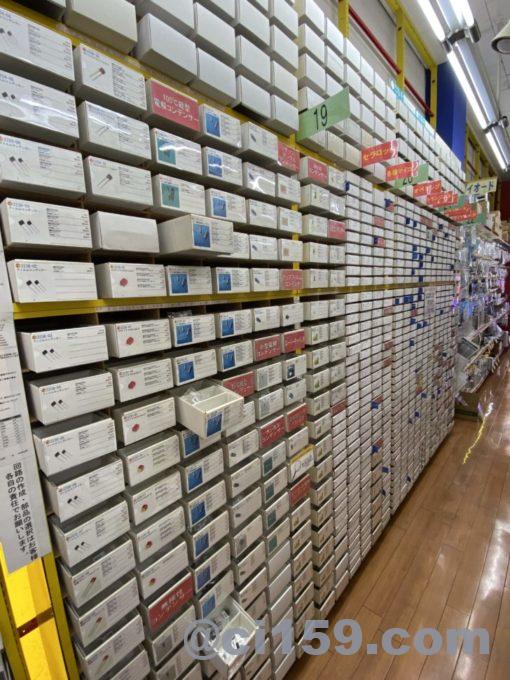
コンデンサの違いがよく分からず、とりあえず店員さんに聞いて無事購入完了。
ちなみにコンデンサの費用は6個で500円くらい、、
安いのか高いのかさっぱり分からない。
コンデンサの取り付け
調達したコンデンサを基板に半田ごてで取り付ける。
コンデンサには極性があるので、取り付ける向きを間違えないよう注意が必要。
※基板にある白線側にコンデンサのマイナス(色違いで分かる)がくるように取り付ける
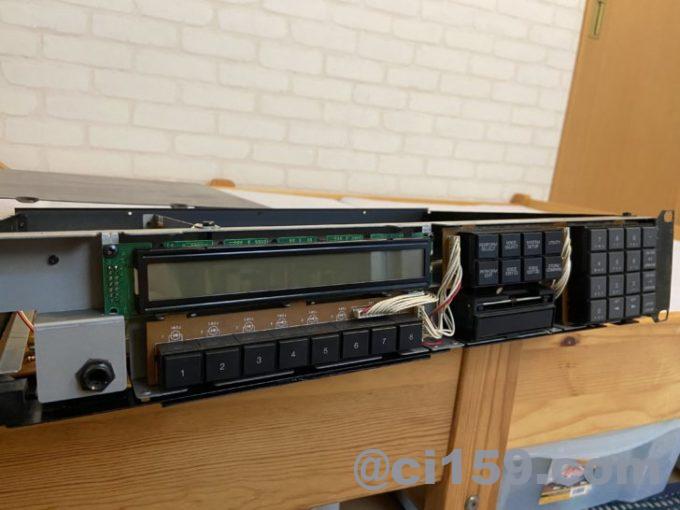
好奇心でフロントパネルも開けてみた。
液晶部分は予想通りだがスイッチ類はすごくシンプル。
フロントパネルでスイッチ類が固定されるため、開けた状態ではグラグラで不安定 。
すぐパネルを取り付け直した、、
動作確認
電源を入れるときはコンデンサが爆破しないか緊張したが、
無事、バックライトが点灯して電源が入った。

まとめ
FM音源を聴いても今更感動することはない。
が、80年代の「TM NETWORK」ファンには馴染みのあるFM音源。
同じ作品は到底作れなくても、憧れの作品で使用されていた音が手軽に扱えるのは嬉しいことだ。
昭和で大活躍した音源モジュール「TX802」には令和でも頑張ってもらおう。
]]>